INVITEDbyRUK

Showing posts with label cake pops. Show all posts

Sunday, February 13, 2011

MONSTER PARTY

Mr 7 asked for a monster themed party this year and I happily agreed thinking "great, monster will be easy right?"... hmmm, not so much! I am lucky enough to own a Cricut and he chose 2 designs from it for his invitations so I based everything on that :)

then I decided a matching bunting, cupcake picks and shirt would work well too... I was happy with how they turned out... particularly the matching cupcake picks! The great thing about creating your own party supplies is that you can match all the colours exactly how you want to and the end result is great :) I made a streamer curtain to hide the view of our kitchen, but it added alot of colour too!

our party food consisted of:
monster body parts (marinated chicken pieces), monster boogers (caramel popcorn), monster eyeballs (gumballs), baby monsters (rice crispies), monster pops (cake pops), monster tongues (Fizzers), monster cupcakes, monster bits (fruit kebabs), monster slime (jelly), monster fingers with blood (hotdogs with sauce


I was going to leave our cake as this cupcake tower but OH NO! Mr 7 would not have that... "muuuum, I KNOW you can make a cool monster cake". Yeah, little did he know that for weeks I was searching and trying to think of what to make and was just coming up blank!! I was kind of getting stressed the night before as I started baking, but Mr7 inspired me with "How about a monster with his mouth open and lollies inside?". I'm not sure it was what he pictured, but it was the best I could do with a lack of inspiration and talent in the cake department... and he seemed happy in the morning when he saw it :)


our drinks were held in monster cups that guests had to design themselves... we just pre-stuck the googly eyes on

How about what to do with 15+ little monster guests??! Our house isn't big, but we have a pool, so a swim was a must (and Mr7's birthday falls always on a HOT summer day), and of course we had to have some craft in there so we ordered these great DIY monster magnets and foam beads from Oriental Trading which kept the kids busy for a while.


and we made this pinata *TIP* dont do more than 2 layers of paper mache... our pinata required surgery to help bust him after 10+ minutes of the kids trying LOL

our pass the parcel contained this cute plush toy I found at Target

and we had a stationary set prize for our 'pin the eye on the monster' game

using our beloved Cricut, we made our own party bags, and again found great monster party favours for them at Oriental Trading, plus the usual lollies and stickers

I HAD to use the Cricut to make his birthday card too of course

Mr 7 had a great time and I have to say, so did I... MONSTERS were more fun than I thought ;)

Saturday, February 5, 2011

Cake Pops

Hmm, so its been a while huh? I didn't quite get to my Christmas posts, but maybe this can make up for it??

I LOVE kids parties if you haven't already guessed and have seen so many posts and gorgeous inspiration boards featuring cake pops, and every time I see them I think "I must try that". This girl loves to talk inspired me do make them again in October, but I never got around to it, so with it being Mr 6's soon Mr7 birthday tomorrow I thought I'd test them out for him to take to class and celebrate.

I got my instructions from Little Miss Momma and basically followed them. I used a Green's Chocolate cake mix and baked my cake then after it cooled, crumbled it with my fingers I found it quite therapeutic!

Next I added half a tub of the Betty Crocker chocolate frosting and made sure the consistency was right to hold the whole thing together in a big ball.

I used about a tablespoon of the mix to roll smaller balls and ended up with 45. I put them into the fridge for a few hours, but it's recommended that you put them into the fridge overnight... we were impatient and pressed for time.

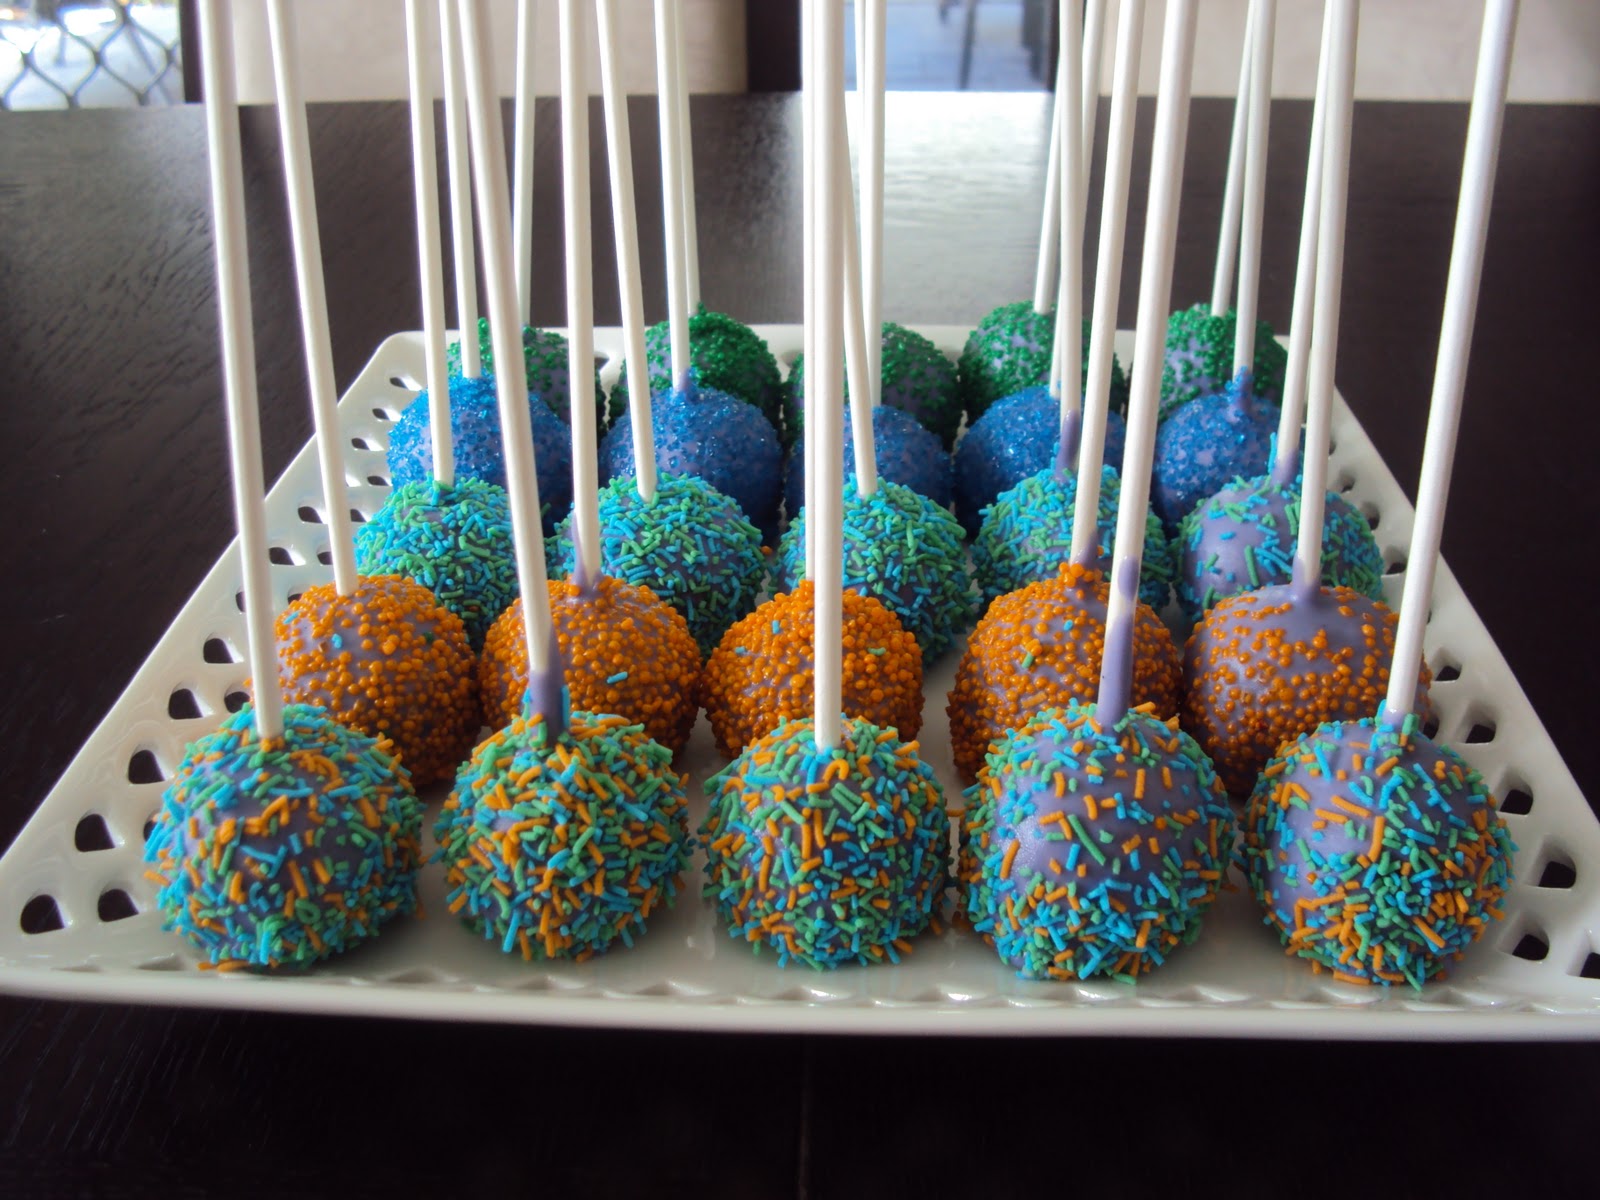
I melted a whole packet of Nestle White Chocolate Melts and added some POWDERED colouring to make mine purple. If you're looking for powdered colouring and lollipop sticks I got mine from Inspired by Chocolate. DO NOT ADD LIQUID COLOURING as this will ruin your chocolate and you wont be able to use it. I found this out the hard way at Halloween when I didn't think and added a few drops of green food colouring to my melted white chocolate= disaster!. Adding the powdered colouring before melting helps the colour disperse more evenly without little lumps so you don't end up with "streaky" coloured chocolate unless you want a marbled look I guess :)


powder colouring

purple chocolate!


Next take your lollipop stick and dip it in some chocolate then poke into your cake ball.


Dip your cake pop into the chocolate mix and twist around allowing excess chocolate to drip off. 

We had a selection of 'sprinkles' to choose from and used a spoon to sprinkle them on top of the coated cake pop. I imagine in winter you'd have to be fast doing this before the chocolate hardens, however, with it being 30+degrees today yes I am mad and baked the cake this morning too I had ample time to do this within. The place to 'dry' and harden. I was planning on using a styrofoam block to stick the pops into for this, BUT turns out we didn't have one, so I decided to just dry them upside down. Place in fridge until ready.


And.... TA DA! Our cake pops are all ready for school tomorrow...

BUT I did have to sample one... WARNING they are super sweet!! YUM!